
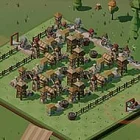
Refund Me TD
Play Refund Me TD, a maze-building tower defense strategy game, free in your browser. No download, no sign-up.
You may like
















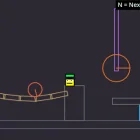








You plant the last fence in the meadow of Refund Me TD, press start, and watch two rogues sprint down a road that has become far longer than the one you were given. The Beehive nearest the gate is still launching its first bees when the pair reaches the second bend, and the maze you built is already doing more work than any single tower. Fifty levels of that logic lie ahead, and a two-hour clock hangs over every fence you place.
| Genre | Maze-building tower defense strategy |
| Platform | PC |
| Levels | 50 |
| Time Limit | Two hours of total play time |
| Towers | 8 tower types |
| Players | Single player |
Fencing the Meadow in Refund Me TD: Why the Maze Is the Real Weapon
There is no fixed path here. You get a meadow, a gate where the waves walk in, and a gate they are trying to reach, and everything between the two is yours to shape. Every fence you plant makes the road longer, and a good layout can turn a twenty-cell walk into a hundred-cell one. Each extra cell is another second your towers get to work, which is why tower defense veterans call this approach mazing and treat it as the main source of damage. The game will not let you wall the road off completely, but it lets you get cruelly close.
Beginners usually do the opposite of what the board wants. They drop towers beside the entrance gate first and add fences later, so waves cross the damage zone once and leak through.
A better habit is to fence first and then place towers along the longest stretches of road. Players who grew up on classic maze maps will feel at home here, though the colorful, cozy look hides how unforgiving a lazy layout becomes once knights start walking. Early in the game a single long corridor is enough, but as the meadow starts growing you have to rebuild your road around the new edges.
Eight Towers, Eight Jobs
Each of the eight towers has a clear identity, and you can tell them apart from across the board. That matters because towers arrive as cards, one at a time, so you rarely get to build the layout you planned. Here is what each one does:
- Beehive: throws bees at whatever walks the road
- Bread Oven: lobs something heavy and leaves a crater
- Quench Barrel: releases a mist that hangs in the air and slows anything passing through
- Watchtower: hits everything on a line at once
- Fire Lookout: a tower on stilts that lands the single hardest hit in the game
- Fire Pit: sends embers drifting upward
- Windmill: makes neighboring towers better at their jobs
- Market Stall: quietly makes you money
The support towers are where planning gets interesting. The Windmill does no damage on its own and the Market Stall only pays you back over time, so every one you place needs to be justified later. A Quench Barrel at a bend slows waves exactly where your maze keeps them longest, which stacks neatly with a long road.
Players who enjoy economy-first strategy will lean on the Market Stall early, while those who prefer raw damage will chase the Fire Lookout and accept the risk. Both approaches get tested the moment sappers arrive.
Rogues, Knights, Skeletons and the Sappers on Every Eighth Level
The regular waves are easy to read once you know them. Rogues come fast and in ones and twos, so they punish gaps in coverage rather than weak damage. Knights and barbarians come slowly and take an unreasonable amount of killing, which rewards the long maze you built earlier. Skeleton minions arrive in numbers with mages beside them, and they test whether your layout can handle crowds. Everything arrives in mixed health, so planning for the front of a wave is a reliable way to lose the back of it.
Sappers change the rhythm of the whole run. Every eighth level a sapper wave shows up hauling a keg, and they are their own species, far tougher than anything else on the field. They have no interest in your lives and go straight for your towers. When one reaches a cluster, that cluster is gone with no repair and no cheap rebuild, leaving a crater where your best three towers stood for the rest of the run.
The permanent crater is the part players argue about most, because it can end a run that was going well. Spreading towers out is the standard answer, and it costs you focused damage. A few habits help before a sapper level arrives:
- Spread towers so no single sapper can reach a cluster of three.
- Stretch the road with extra fences so the keg carriers spend longer under fire.
- Aim your damage at the back of the wave, not only the front.
Flyers: The Two Waves Your Maze Cannot Touch
Twice in a run, flyers cross the meadow. A flock flies in a straight line from gate to gate, over every fence you laid, so the one thing you spent the whole level building does nothing against it. Only the Watchtower and the Fire Lookout can reach them, and every other tower says so on its card. You are warned a level ahead, and what you do with that level is the point.
Treat the warning as a build order. Ignore it and you end up with a wall of Beehives and Bread Ovens that cannot touch the flock.
Because the flock takes a straight line, the Watchtower, which hits everything on a line at once, suits it well. The Fire Lookout’s single hard hit handles anything tough enough to survive the first pass. Covering the straight route between the gates, rather than the winding road, is the adjustment most newcomers miss on their first flyer level. Players who race the clock may resent spending a level on dedicated anti-flock towers, yet the game gives no way around it.
One Card at a Time: Modifiers and a Meadow That Keeps Growing
Towers and upgrades arrive one card at a time, so you never get everything. A run becomes a shape rather than a checklist: go wide and take a modifier that pays for breadth, or go deep on three towers and take the one that rewards it. Two attempts at the same fifty levels rarely feel alike because of this.
The board will not hold still either. Six times in a run the meadow grows, and never evenly: north first, then east, then south, then west, then both ends at once, then every side together. You are told a level in advance, and growth never lands on the same level as the sappers. Knowing it is coming and having a maze that survives it are very different things.
A rare card grows all four sides on top of that, if you are lucky enough to be offered it. Players who like cozy, low-stress strategy will enjoy the first few expansions, then notice that every one forces a rethink of where the longest stretch of road now runs.
The Two-Hour Clock in Refund Me TD
The whole deal is fifty levels in two hours of total time, counted while the game is open. The clock pauses when you close the game and resumes when you return. Starting another run does not reset it, so a failed attempt costs time you cannot buy back. That works out to an average of 2.4 minutes per level, which sounds generous until a sapper level makes you stop and rebuild.
This is the most divisive rule in the game. Some players love that the pressure gives every run real stakes, while others dislike that testing a risky layout eats into the allowance. Player reviews sit at mostly positive, which suggests the dare lands for most people who try it.
Clear all fifty before the time runs out and the game asks the question it has been building toward: do you want your money back? Taking the refund is a legitimate ending, because the whole run was designed as a dare. There are no ads, no purchases and nothing to unlock over time, so the clock is the only thing the game asks of you.
Questions Players Ask Before Taking the Dare
How long does a Refund Me TD run actually take?
The limit is two hours of total play time across fifty levels, counted only while the game is open. Closing the game pauses the clock, and starting a new run does not reset it. You average 2.4 minutes per level, so sapper levels and meadow expansions are where most players lose their margin.
How do you stop sappers in Refund Me TD?
A destroyed cluster cannot be repaired, so prevention is everything. Spread your towers out, lengthen the road with fences, and keep damage aimed at the back of the wave as well as the front. Sappers arrive every eighth level, which gives you a predictable schedule to prepare for.
Which towers can hit flyers in Refund Me TD?
Only the Watchtower and the Fire Lookout can reach the flock, and every other tower card says it cannot. Flyers appear twice in a run and you are warned one level ahead, so use that level to place both along the straight line between the gates.
Refund Me TD works because every fence, every card and every sapper level pushes against the same two-hour limit. A well-placed Watchtower, a Quench Barrel at the right bend and a maze that survives the next meadow expansion are what separate a clean run from a wasted afternoon, and whether you take the refund at level fifty is entirely up to you.
Other Action Scratch Games You May Like
Enjoyed Refund Me TD? These picks from the same genre are a good next step:



Player Reviews
There are no reviews yet. Be the first one to write one.